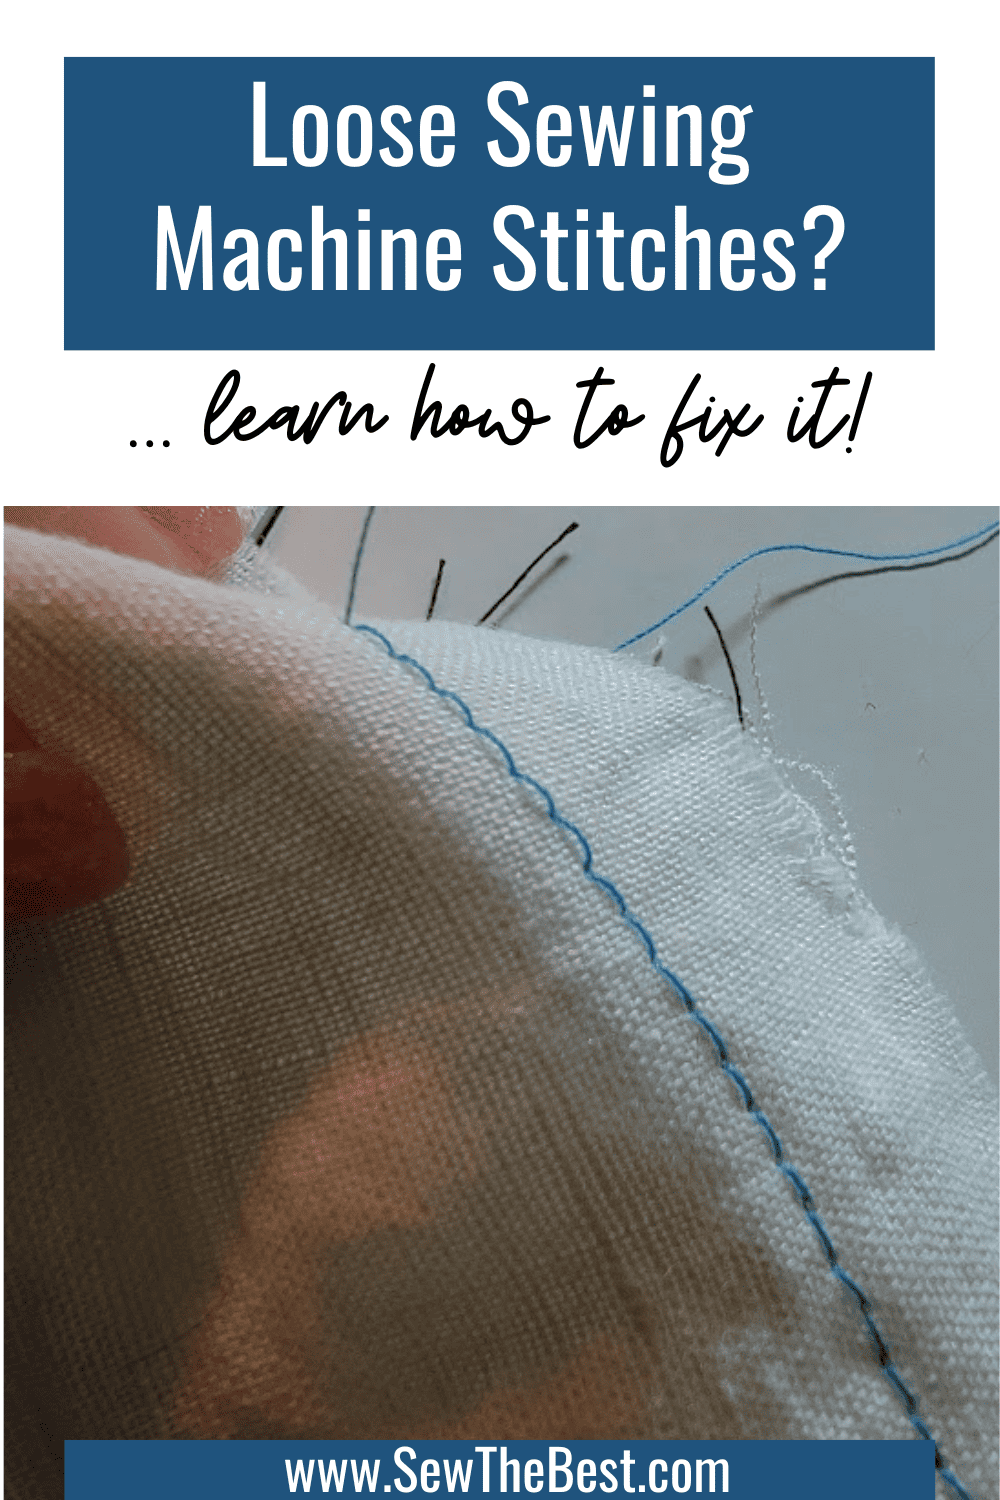
Have you ever experienced the frustration of loose stitches while using a sewing machine? Those pesky loose stitches can be quite a nuisance, causing our sewing projects to look messy and unravel easily. But fear not! In this article, we’ll unravel the mystery of loose sewing machine stitches and show you how to fix them. You see, stitch tension plays a crucial role in achieving high-quality sewing. Stitch tension refers to the tightness or looseness of the stitches formed by the sewing machine. It determines how neatly the fabric is held together, affecting the strength and appearance of your creations. So, let’s dive in and discover the secrets to achieving perfect stitch tension and say goodbye to loose stitches once and for all!

What are loose stitches?
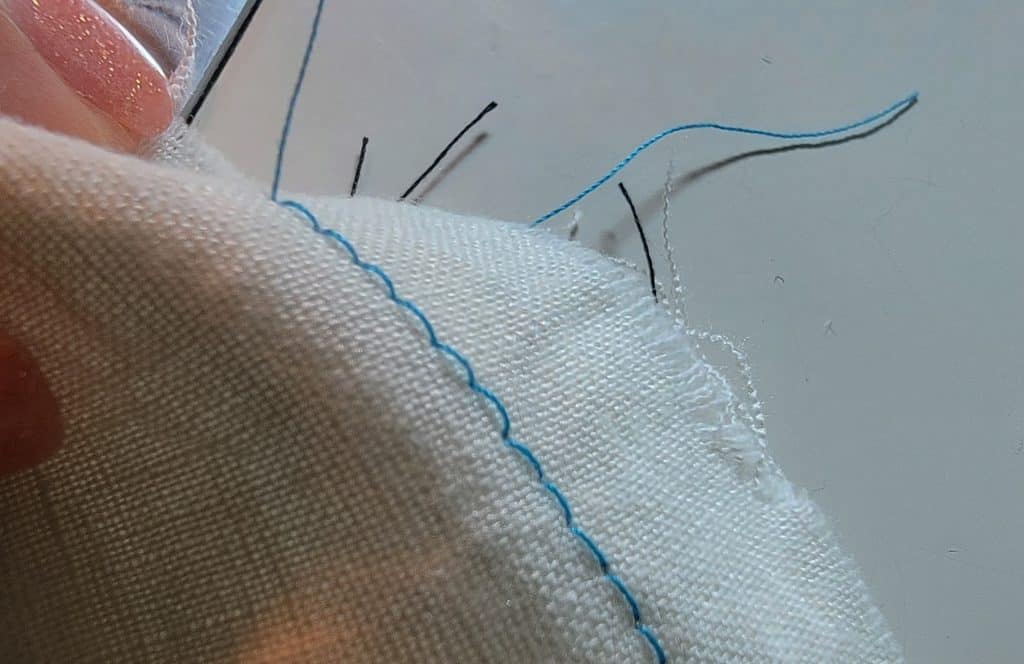
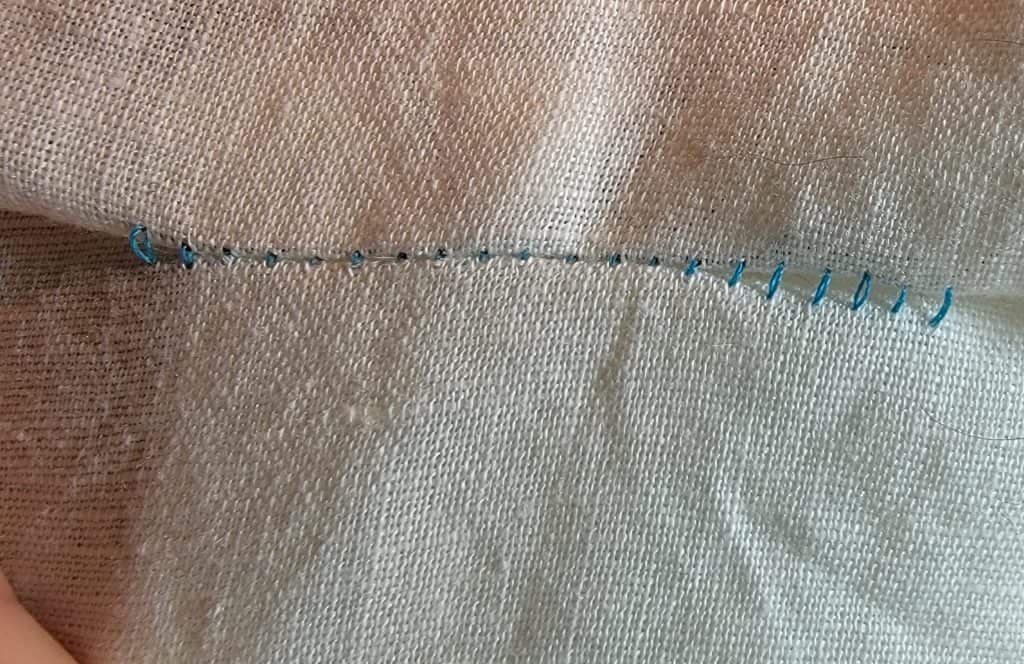
Recognizing loose stitches is essential in diagnosing the stitch tension problem. So, how can you spot them? Take a close look at the stitches on your fabric. Loose stitches will appear uneven, with noticeable loops or gaps between them. When you gently pull the fabric, the stitches may easily come apart or slide along the threads. Another clue is the appearance of “bird’s nests” or tangled thread on the bottom of the fabric. These are signs that your sewing machine’s stitch tension needs adjustment. You can have loose sewing machine stitches on the bottom of your project, or loose sewing machines on the top of your project. Usually the loose stitches are on one side or another, but these uneven stitches can also be caused by both sides! By becoming familiar with the characteristics of loose stitches, you’ll be equipped to tackle the issue and restore the perfect balance in your sewing projects.
What is thread tension?
Stitch tension is a crucial element in the sewing process. It refers to the tightness or looseness of the stitches formed by the sewing machine. Proper stitch tension ensures that the upper thread and the lower bobbin thread interlock evenly within the fabric, creating strong and neat stitches. Too loose tension can result in stitches that easily come undone, while overly tight tension may cause the fabric to pucker or break. Stitch tension is controlled through a mechanism in the sewing machine called the tension dial. Some sewing machines can also have a thread tension adjustment on their bottom thread, often on the bobbin case itself. These dials allow you to adjust the amount of tension applied to the thread, affecting how tightly the stitches are formed. By finding the right balance of tension, you can achieve professional-looking stitches and ensure the longevity and quality of your sewing projects.
How to test thread tension
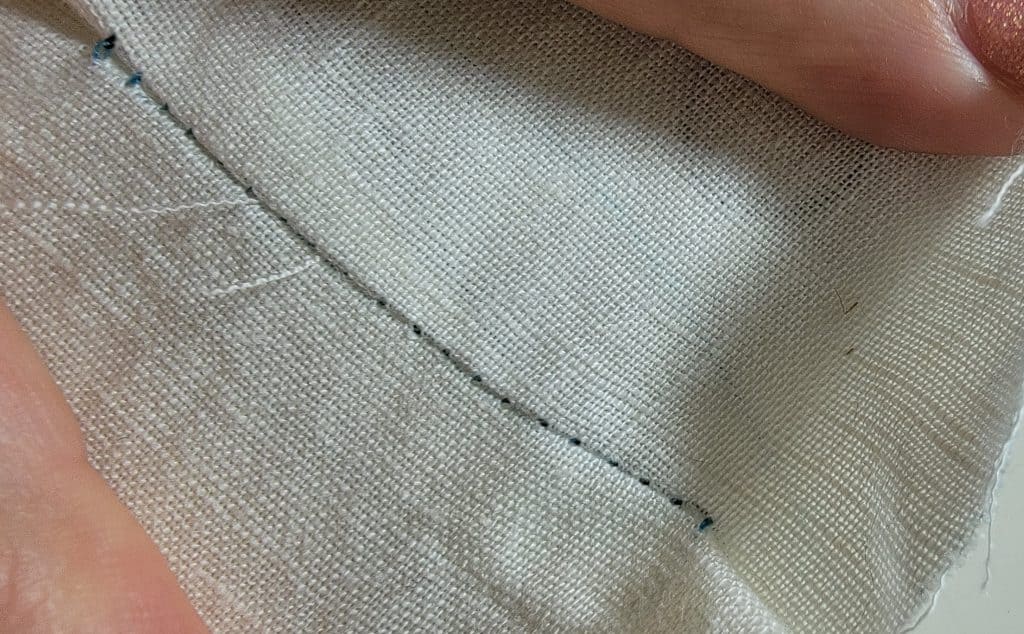
Setting the correct stitch tension for your specific material is crucial in achieving optimal sewing results. To determine if your stitch tension is set correctly, you can perform a simple test. Take a scrap piece of the fabric you’ll be sewing and sew a few test stitches. Examine the stitches on both sides of the fabric. If the stitches appear balanced, with the upper and lower threads evenly interlocked in the middle, and there are no visible loops or puckering, then your stitch tension is likely set correctly. However, keep in mind that different materials may require different tension settings. Thicker fabrics such as denim or upholstery fabric often require slightly looser tension, while delicate fabrics like silk or chiffon may need tighter tension to prevent the stitches from pulling or distorting the fabric. It’s important to refer to your sewing machine’s manual or consult sewing guides to determine the recommended tension settings for specific fabrics. Remember, practice and experimentation will help you find the ideal tension setting for each material you work with, resulting in beautifully sewn projects.
Troubleshooting loose sewing machine stitches
To troubleshoot loose sewing machine stitches, there are four basic steps that solve most tension issues. These steps are to:
- check the presser foot lever
- check the thread
- adjust the sewing machine tension
- test your stitch settings
Check the presser foot lever
Ok, this one is a bit silly – but you would be surprised how often this is the culprit. The very first thing to check when you have loose sewing machine stitches is the lever that lowers your presser foot. When you are sewing, you need to be sure to have the presser foot lever down in the “sewing” position. If this lever is not in the sewing position, you machine will not have the tension settings applied to it. I often find this to be the culprit behind birds nests on the underside of the fabric and the thread getting caught up in the bobbin area. Even if you are sewing thick fabric or doing free motion embroidery, having this lever down is critical to having your thread tension set, especially your top thread tension. The good news is this problem is really that easy to solve. So double check your lever!
Check the thread
To begin troubleshooting loose stitches, the first step is to check the thread. Ensure that the thread is properly threaded through the machine, following the threading path as indicated in your sewing machine’s manual. Sometimes, loose stitches can occur if the thread is not correctly positioned in the tension disks or the thread guides. I’ve also found that occasionally my thread can slip out of the take-up lever without me noticing. Additionally, inspect the thread itself for any tangles or knots. Tangled or poorly wound thread can cause irregular tension and lead to loose stitches. If you notice any issues with the thread, rethread the machine with a fresh, properly wound spool of thread and ensure it is securely threaded through all the necessary components. I’ve found that re-doing the upper threading on my sewing machine can often fix upper thread tension issues as well as lower thread tension issues.
Tired of threading your sewing machine? Check out the best self threading sewing machines!
While you are checking the upper threading, also check the lower threading. Pull out your bobbin case and take a look at how it is wound. Your bottom thread may have issues if your bobbin was not wound tightly enough, became knotted on the bobbin, or is just not quite right. So be sure to pull out your bobbin and take a look.
Adjust the tension dial
The tension dial on your sewing machine allows you to control the upper tension on your sewing machine. To fix loose stitches, it may be necessary to adjust this dial. The tension dial determines how much tension is applied to the thread as it travels through the machine. If you’re experiencing loose stitches on the top of the fabric, try turning the tension dial slightly higher to increase the top tension. Start with small adjustments and test the stitches after each adjustment. Depending on your machine, increasing the tension may involve turning the dial to a higher number or tightening a screw. Consult your sewing machine manual for specific instructions on adjusting the tension dial for your particular model.
Some sewing machines, specifically ones with side mount bobbins, may also have a thread tension adjustment on the bobbin case itself. If you are seeing loose stitches on the back of the fabric you would want to adjust this setting. This is usually a small screw on the bobbin case that you turn to adjust how tight the lower thread tension is. Be sure to check your manual to find out if you have a bobbin tension mechanism and how it works.
Test your stitch settings
After making adjustments to the thread and tension dial, it’s essential to test the stitch on a scrap piece of fabric. Sew a few test stitches and observe the results. Examine the top and bottom sides of the fabric. Ideally, the stitches should appear balanced, with the upper and lower threads interlocking neatly in the middle. There should be no visible loops, gaps, or puckering. If the stitches still appear loose, make further adjustments to the thread or tension as needed and continue testing until you achieve the desired outcome. Remember to test the stitch after each adjustment to ensure you’re on the right track. The goal is to find the sweet spot where the stitches are secure, even, and provide a professional finish to your sewing projects.
More troubleshooting tips for loose machine stitches
If the three steps above don’t fix your sewing machine tension problems, you can try some more drastic troubleshooting of your sewing machine to determine what’s causing your loose sewing stitches. Generally, if double checking the threading of the machine and adjusting the tension doesn’t work, you may need to clean the machine or double check your needle and thread. If all of the above troubleshooting doesn’t work and you still have tension issues, it may be time to take it to a repair shop.
Cleaning your sewing machine to fix loose machine stitches
Regular machine maintenance is essential for optimal stitch tension and overall sewing performance. Dust, lint, and accumulated debris can affect the smooth movement of the machine’s components, including the tension discs. To maintain proper stitch tension, it’s important to keep your sewing machine clean. Start by unplugging the machine and removing the needle, bobbin, and presser foot. Use a small brush or a lint brush to gently clean the tension discs, removing any lint or debris that may have accumulated. You can also use a soft, dry cloth to wipe the surface of the machine. Also brush out your lower bobbin holder to get rid of any lint in there. Giving a dirty machine a good cleaning can sometimes resolve tension issues. Regularly cleaning your sewing machine will help prevent lint build-up and ensure smooth operation, leading to better stitch quality.
Verify you’re using the right needle and thread for your project
The choice of needle and thread can significantly impact stitch tension. Different fabrics require different types and sizes of needles and threads. Using the wrong needle can damage the material you are working with, not be able to pierce your material, or just leave you with poor stitch quality. When working with thicker fabrics, like denim or upholstery materials, it’s important to use a needle designed for heavy-duty fabrics. The needle’s size should match the fabric weight as well. For delicate fabrics such as silk or chiffon, a fine needle is recommended. Additionally, the thread you choose should be suitable for your fabric. Thicker fabrics generally require thicker threads, while finer threads are better suited for lightweight fabrics. Using the appropriate needle and thread combination for your type of fabric will help maintain proper stitch tension, preventing loose stitches and ensuring a secure and professional finish to your sewing projects.
While you’re checking your needle – when was the last time you changed out your needle? Using a dull needle can lead to needle breakage, fabric damage, and overall just bad quality stitches. So if it’s been a while, change out your sewing needle for a new needle.
Take it to a repair shop
So, you’ve tried all of the troubleshooting above and your sewing machine is still having tension issues. At this point, you will probably need to take your sewing machine into a repair shop so they can verify that the machine is not actually broken, and repair any parts that are. While it’s there, you can also ask them to do a deep cleaning on your sewing machine to make sure that there are no bits of fabric or lint stuck in a place that you can’t access.
Summary
We’ve explored the world of loose sewing machine stitches and learned how to fix stitch tension for better sewing results. We started by understanding what loose stitches are – uneven and easily unraveled stitches that can make our projects look messy. We discovered that loose stitches are primarily caused by improper stitch tension, where the tightness or looseness of the stitches is affected. To troubleshoot loose stitches, we explored several steps. First, we checked the thread, ensuring it was properly threaded and free from tangles. Then, we adjusted the tension dial on our sewing machines, finding the right balance of tension for our specific fabrics. It was important to test the stitches after each adjustment, looking for balanced, secure results. Additionally, we discussed the importance of regular machine maintenance through cleaning and using the right needle and thread for optimal stitch tension.
By following these troubleshooting steps, you’ll be well-equipped to conquer loose stitches and achieve high-quality sewing. Remember, practice and experimentation are key to improving your sewing skills. With proper stitch tension, your projects will have a neat and professional finish, leaving you proud of your sewing accomplishments. So, go ahead, confidently create and sew with the knowledge of how to fix loose stitches and make your sewing projects shine!
Related Posts
- Sewing machine beyond repair? Looking for a great budget-friendly replacement machine? Check out the best budget sewing machines
- Want something with a few more features? Check out the best sewing machines under $500
- Looking for a great beginner sewing machine? Check out the best beginner sewing machines!